
In this blog, I will show you how to install Fedora 37 with LUKS Full Disk Encryption, snapper, and grub-btrfs packages, allowing you to take snapshots of the / and /home subvolumes as well as perform a full system rollback on the / volume if something goes wrong.
LUKS encryption protects the data in a block device while it is offline. This is especially important for mobile devices such as laptops because your hard drive can be easily accessed if left in the wrong places or, worse, stolen. To access the decrypted content on the device, you need to provide a passphrase or key file. The LUKS Full Disk Encryption will take care of this.
Regarding the snapshot rollback, I hoped that in Fedora 37, the DNF database would be relocated to /usr, as the RPM database was in Fedora 36. Sadly, It did not happen. It is still held back in /var/lib/dnf.
So, to avoid package mismatches between the two databases, I need to keep the /var directory in the rollback regime. I will, however, exclude the /var/log directory so that log data are not lost during rollbacks. You may add more directories if you wish.
Here is a brief overview of what needs to be done.
- Design the disk layout to install Fedora 37.
- Install Fedora 37 with a LUKS encrypted btrfs / filesystem and an unencrypted separate ext4 /boot partition, as the Anaconda installer does not support encryption of the /boot partition.
- After the installation is complete, copy the contents of the /boot partition to encrypted /, and configure GRUB to boot from it.
- Remove the ext4 /boot partition and merge its space with the btrfs volume.
- Configure the system to request the LUKS passphrase only once by supplying the key file.
- Install and configure snapper to take snapshots of the / and /home subvolume.
- Install and configure grub-btrfs to add snapshots menu to GRUB, allowing you to perform a full system rollback on the / volume.
- Finally, do some tests on the snapper 'undo change' and rollback features to ensure that everything is working properly.
If you prefer to install Fedora 37 without LUKS Full Disk Encryption but still have Full System Rollback feature, please visit my other article ‘How to Install Fedora 37 with Snapper and Grub-Btrfs for Full System Rollback‘
If you prefer to install Fedora 37 with LUKS Full Disk Encryption (FDE) using Fedora’s default partition layout, please visit my other article ‘How to Install Fedora 37 with LUKS Full Disk Encryption (FDE)‘.
So let’s begin.
Table of Contents
- 1. Disk Layout for Installing Fedora 37
- 2. Install Fedora 37 Workstation
- 3. Move /boot to the / Filesystem
- 4. Remove the /boot Partition and Reclaim the Space
- 5. Bypass the Additional Passphrase Prompt
- 6. Install and Configure Snapper
- 7. Install and Configure Grub-Btrfs
- 8. Test the Snapper's Undochange and Rollback Features
- 9. Conclusion
- Watch on YouTube
1. Disk Layout for Installing Fedora 37
Since the Anaconda installer does not allow encryption of the /boot partition, either separately or in the / filesystem, you first need to create an unencrypted /boot partition separately. This is how the disk partition appears at first. I will use a 100 GiB hard disk for the demonstration.
NAME          SIZE   FSTYPE         LABEL    MOUNTPOINT
/dev/vda      100G
├─/dev/vda1   512M   vfat           EFI      /boot/efi
├─/dev/vda2    98G   btrfs (LUKS)   FEDORA   /
└─/dev/vda3   1.5G   ext4           BOOT     /boot
When the installation is complete, I will copy the contents of the /boot partition to the / file system. The final disk partition looks like this.
NAME           SIZE   FSTYPE         LABEL    MOUNTPOINT
/dev/vda       100G
├─/dev/vda1    512M   vfat           EFI      /boot/efi
└─/dev/vda2   99.5G   btrfs (LUKS)   FEDORA   /
And, these are the subvolumes that will be created from the encrypted btrfs volume (/dev/vda2).
NAME               MOUNTPOINT          TYPE
[main]             /                   mainvolume
home               /home               subvolume
var/log            /var/log            subvolume
.snapshots         /.snapshots         subvolume
home/.snapshots    /home/.snapshots    subvolume
Below are the directories for which subvolumes are created and the reasons for doing so.
/home
Contains user data. It is created to keep user data separate and also to avoid loss of user data on / volume rollbacks.
/var/log
Contains log files. It is created to avoid the loss of log data during rollbacks.
/.snapshots
Contains snapshots of / volume. Allows you to undo any changes or completely roll back a snapshot from the GRUB menu.
/home/.snapshots
Contains snapshots of /home subvolume. Allows you to undo any changes in the /home directory. No rollbacks from the GRUB menu on the /home directory.
Depending on your needs, you may also want to create some additional subvolumes. For example, /opt, /var/www, /var/lib/libvirt/images, and so on.
2. Install Fedora 37 Workstation
Boot your system using the Fedora 37 Workstation installer in UEFI mode. On the welcome screen, select the Install to Hard Drive option. Next, select your Language, Keyboard, and configure Time & Date. Following that, from the INSTALLATION SUMMARY screen, select Installation Destination.
You should now be on the INSTALLATION DESTINATION screen. To proceed, pick the Advanced Custom (Blivet-GUI) radio button and then hit the Done button.

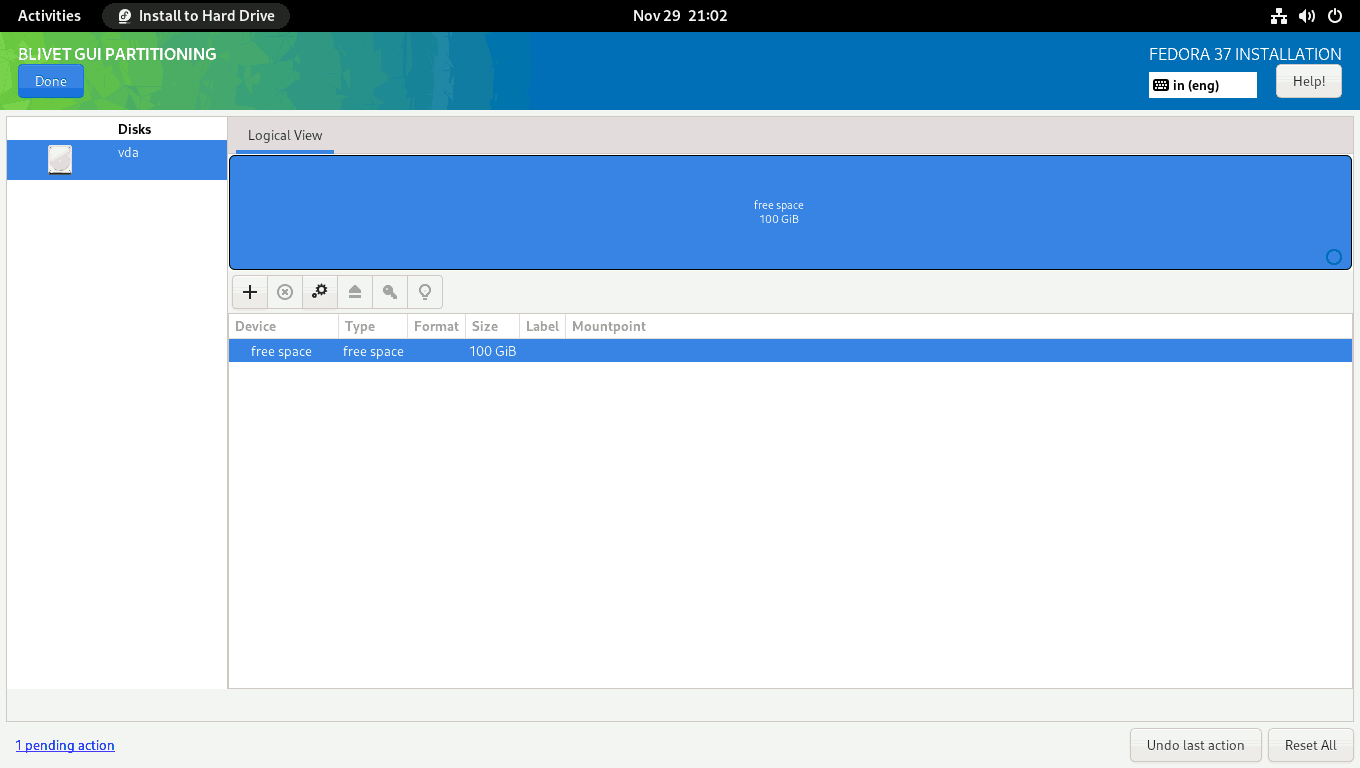
On the BLIVET GUI PARTITIONING screen, create the partitions, file systems, and btrfs subvolumes necessary to install Fedora 37 Workstation.
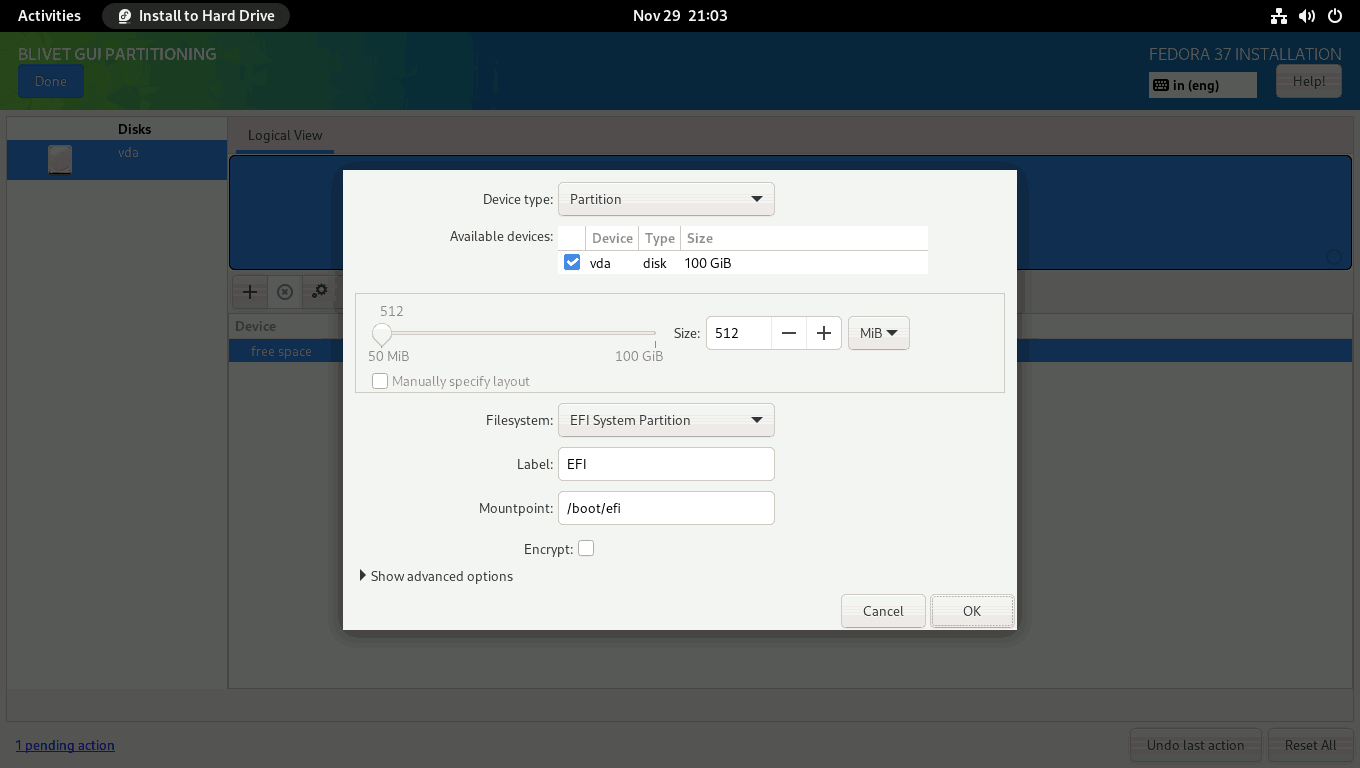
First, you need to create and mount the EFI partition. Select the free space and click the + sign to create a partition.
Set the partition size to 512 MiB, the filesystem to EFI System Partition, and the mountpoint to /boot/efi.
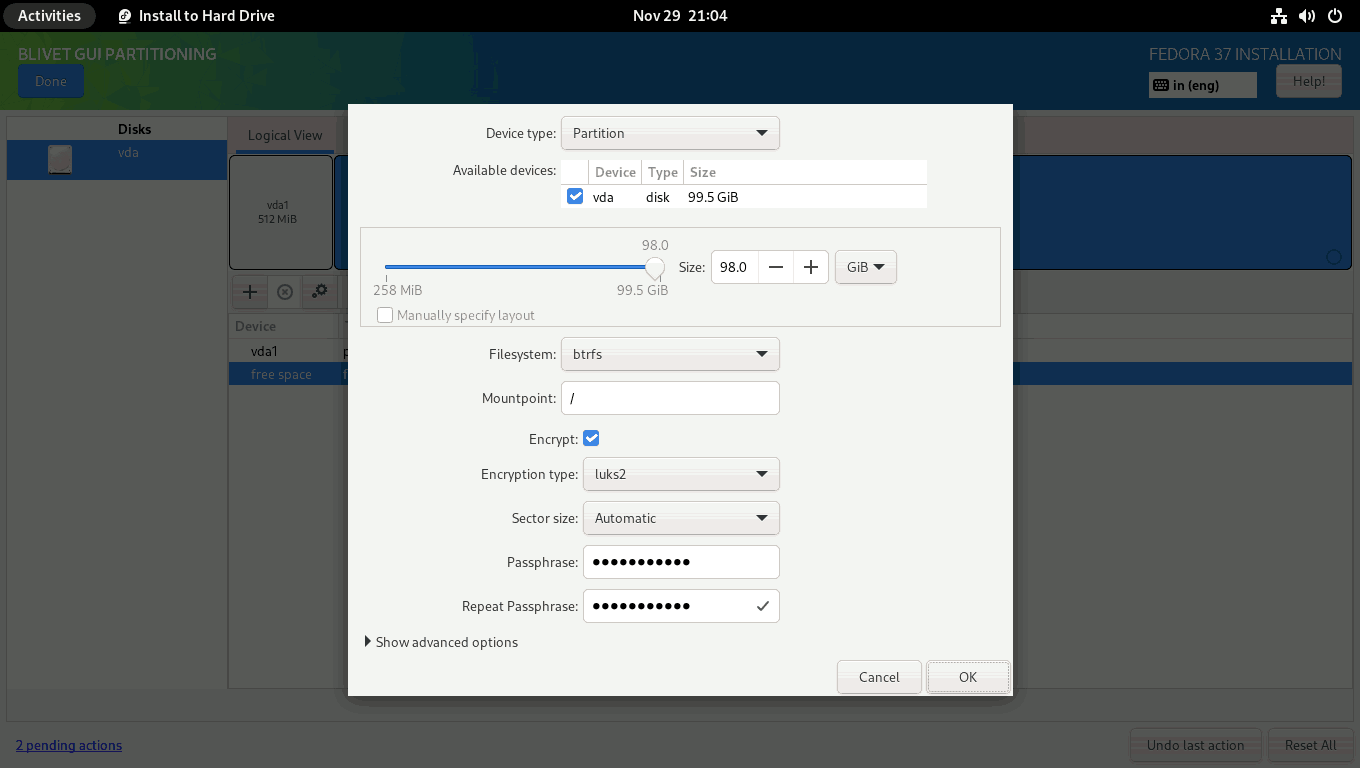
Then, you need to create a btrfs volume where you can create all the subvolumes needed to install Fedora 37 Workstation.
Select the free space again and click on the + sign to create a btrfs filesystem. Set the size of the btrfs filesystem. I allocated 98 GiB for the btrfs filesystem and left roughly 1.5 GiB unallocated for the /boot partition. Set btrfs as the filesystem and / as the mountpoint. Enable encryption, set encryption to luks2, and provide a strong passphrase with entropy greater than 60 bits. Finally, click on the OK button.
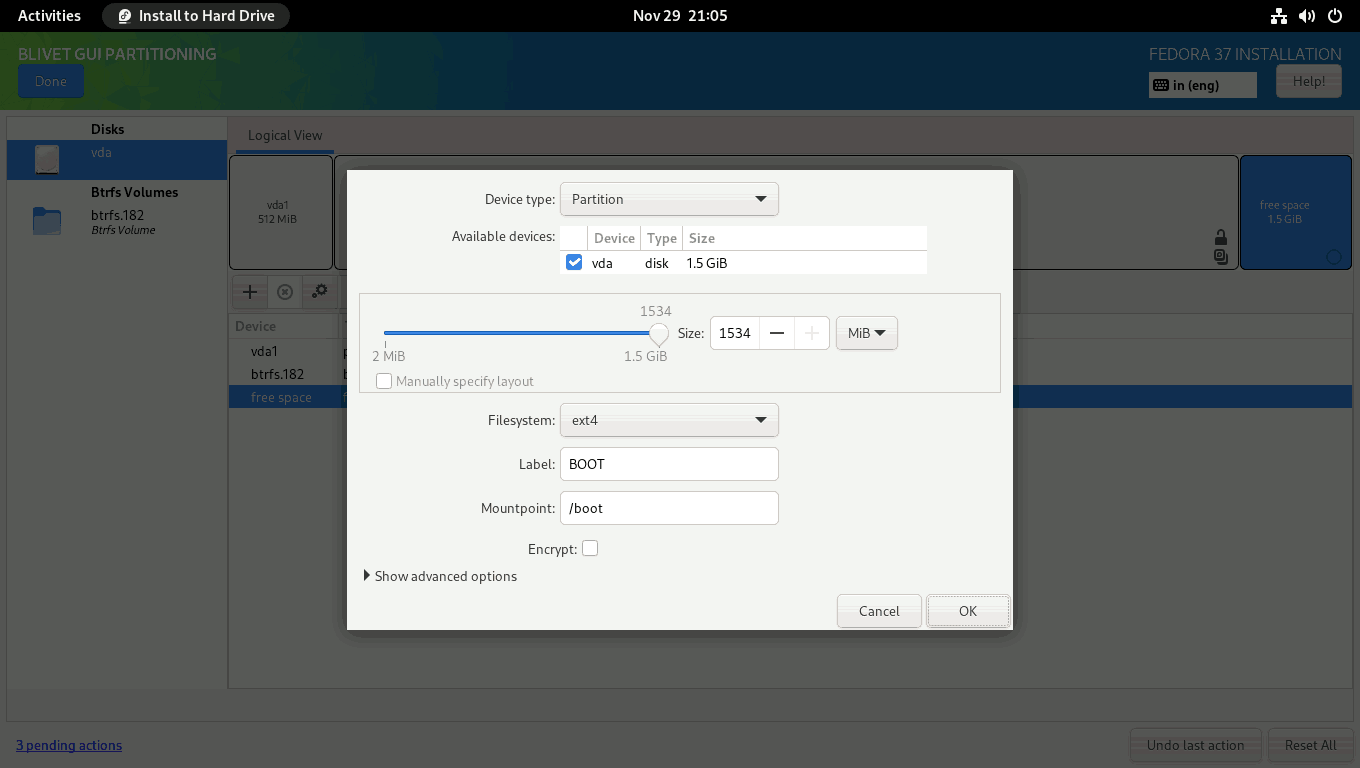
You then need to create and mount the /boot partition. Set the boot partition to use all of the remaining unallocated space (1534 MiB), the filesystem to ext4, and the mountpoint to /boot. After the installation is finished, I’ll move the contents of the /boot partition to the main root file system and merge this 1.5 GiB space with the main BTRFS volume.
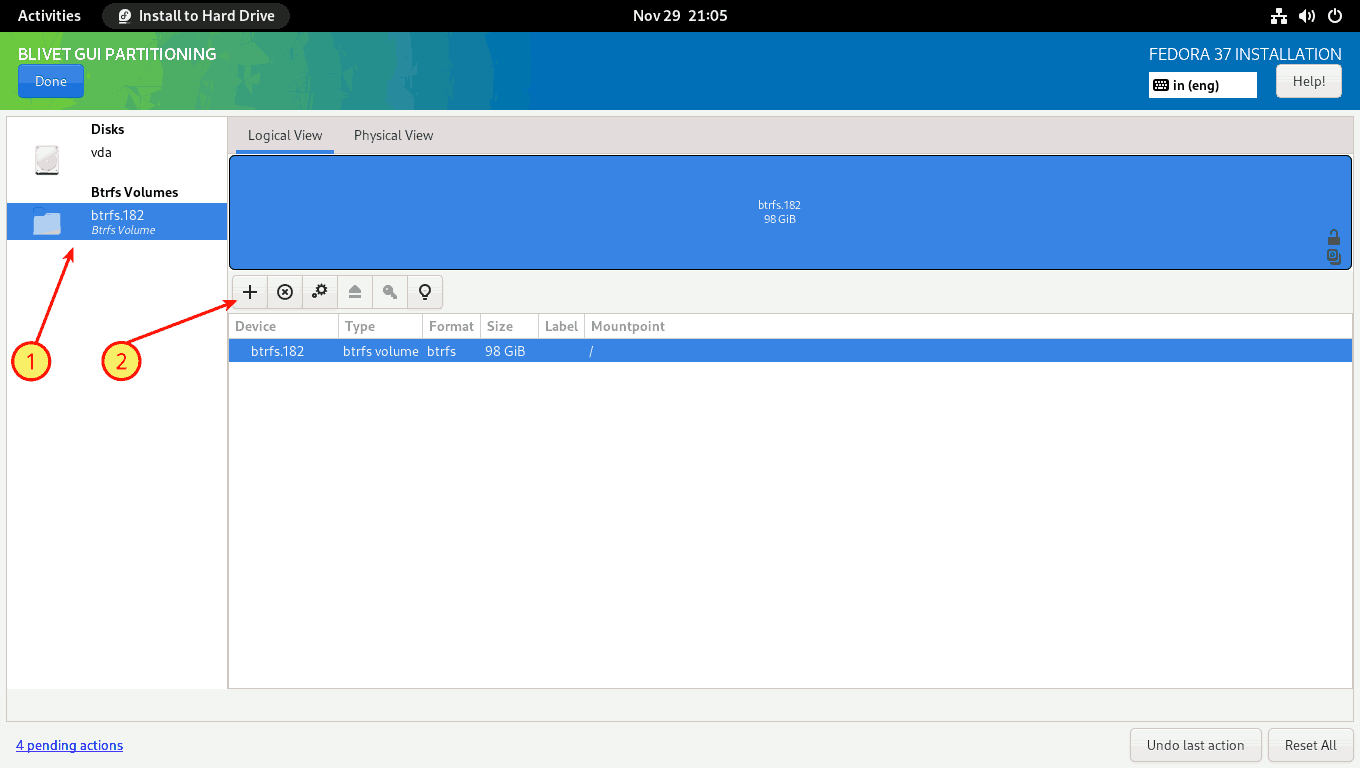
Next, you must create a home subvolume. (1) Select the Btrfs Volume from the left panel, and (2) click on the + sign on the right panel.
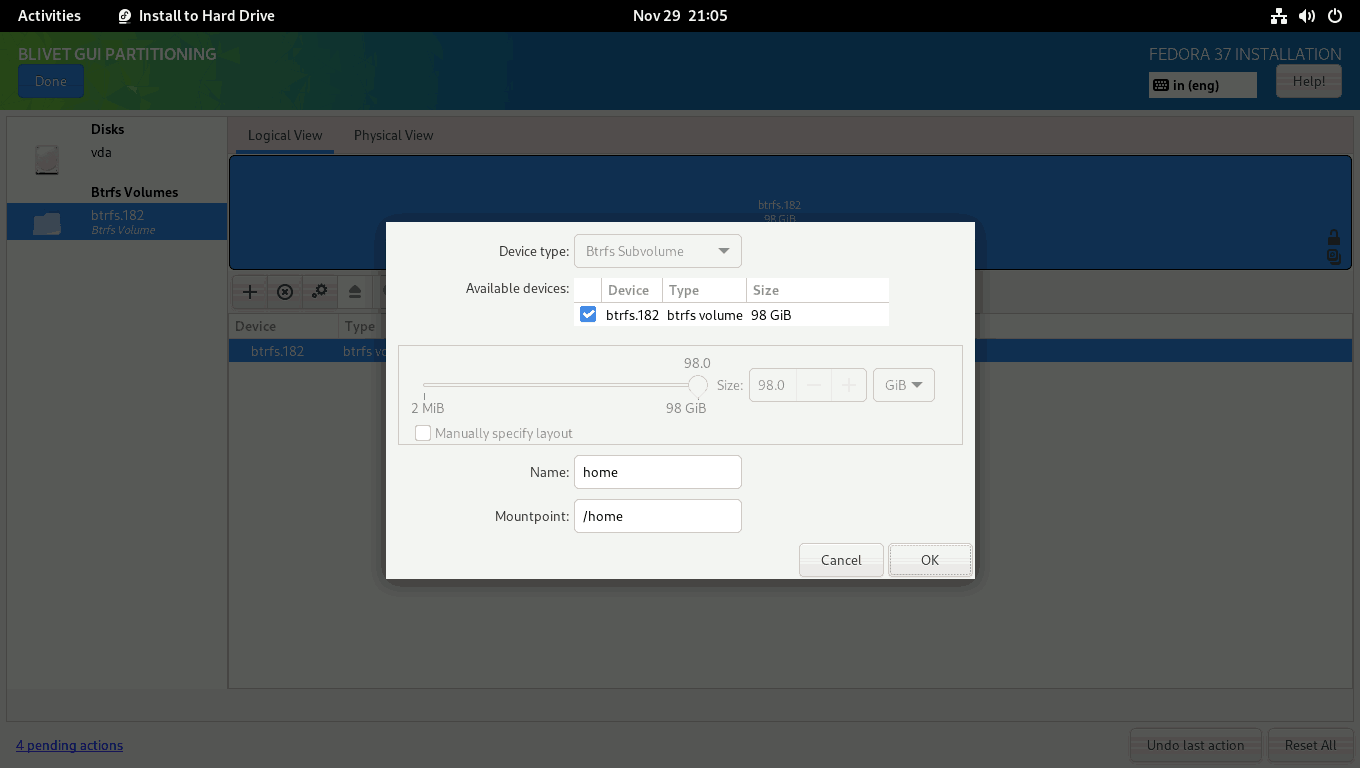
Create a home subvolume. Enter the name as home and mountpoint as /home. Click OK to finish.
I will create the remaining subvolumes when the installation is finished. This is because the Anaconda installer does not allow you to create subvolumes with slashes (/) in their names, such as var/log.
For now, click Done to finish creating subvolumes.
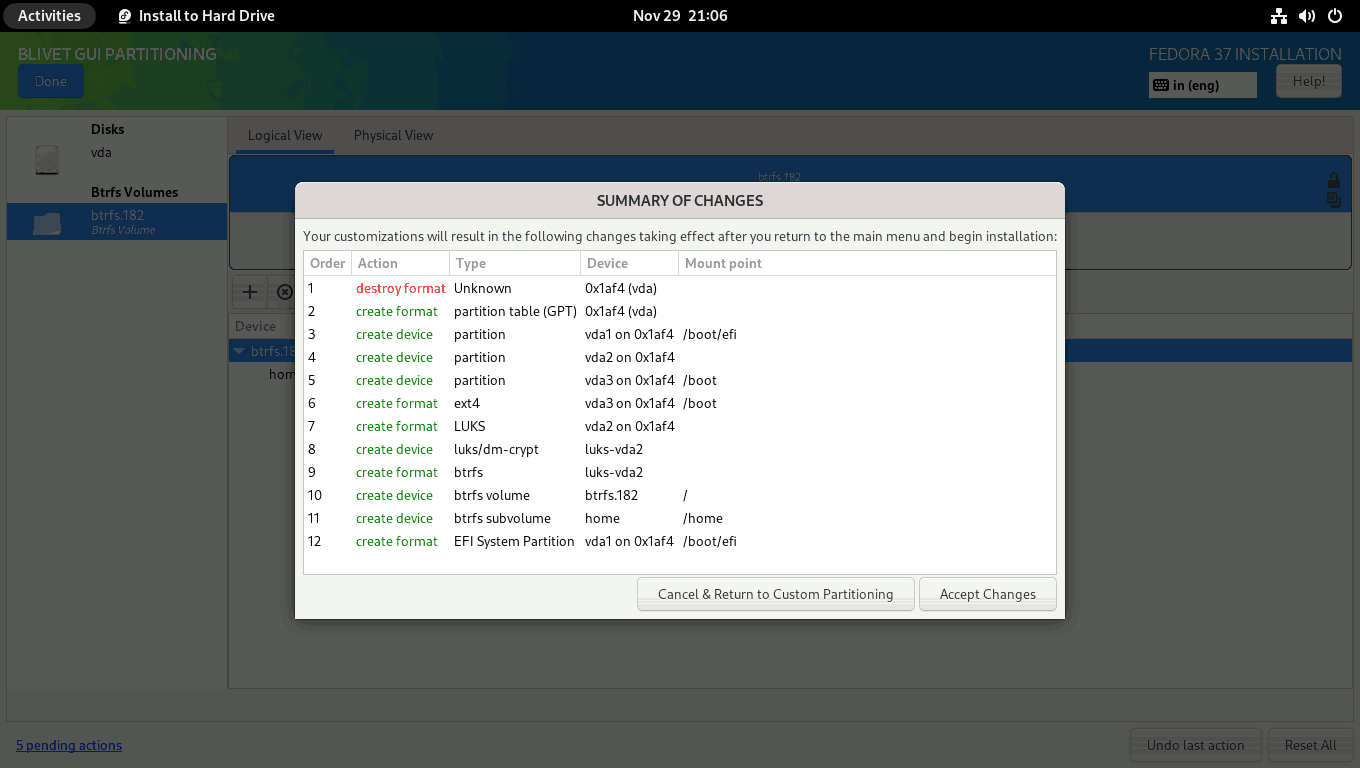
On the SUMMARY OF CHANGES screen, double-check that everything is properly defined. To finalize the changes, click the Accept Changes button.
You will be returned to the INSTALLATION SUMMARY screen. Press the Begin Installation button to start the installation process. The installation process will start. Just sit back and relax.
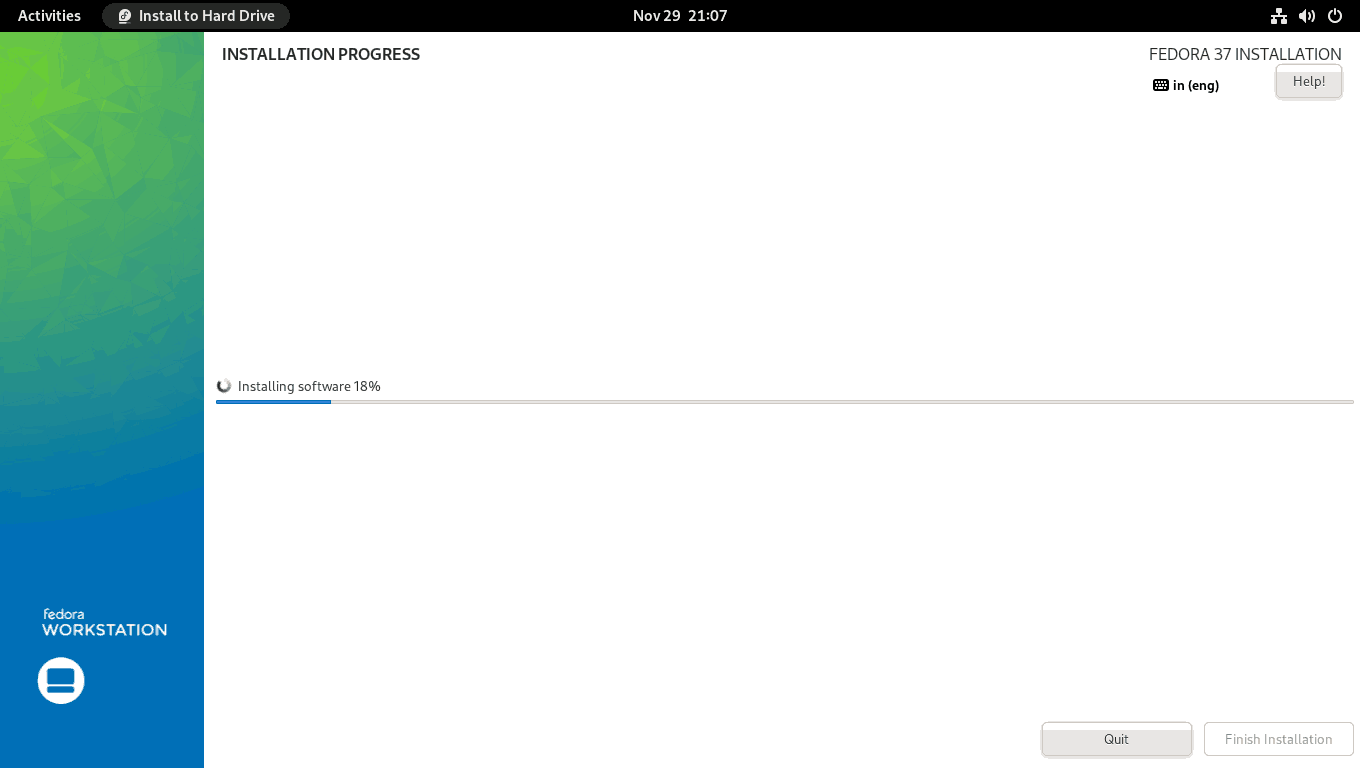
When the installation is finished, click the Finish installation button and restart the system. After the computer restarts, you will be prompted for the LUKS passphrase.
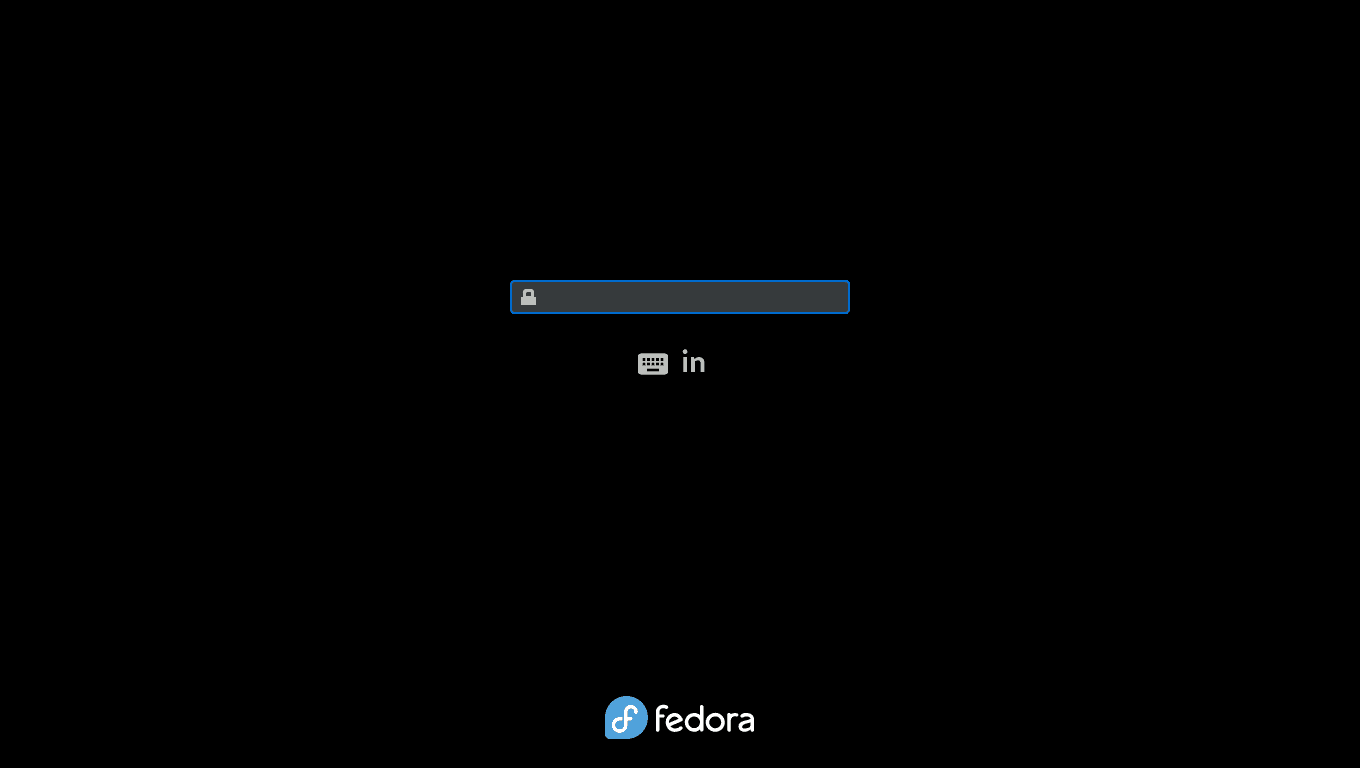
Enter the LUKS passphrase that you provided. The last phase of the installation procedure will start. Click the Start Setup button to complete the remaining customization steps, such as setting a new login, password, and so on.
You will then be logged into the Fedora 37 Workstation with the all-new Gnome 43 desktop interface.
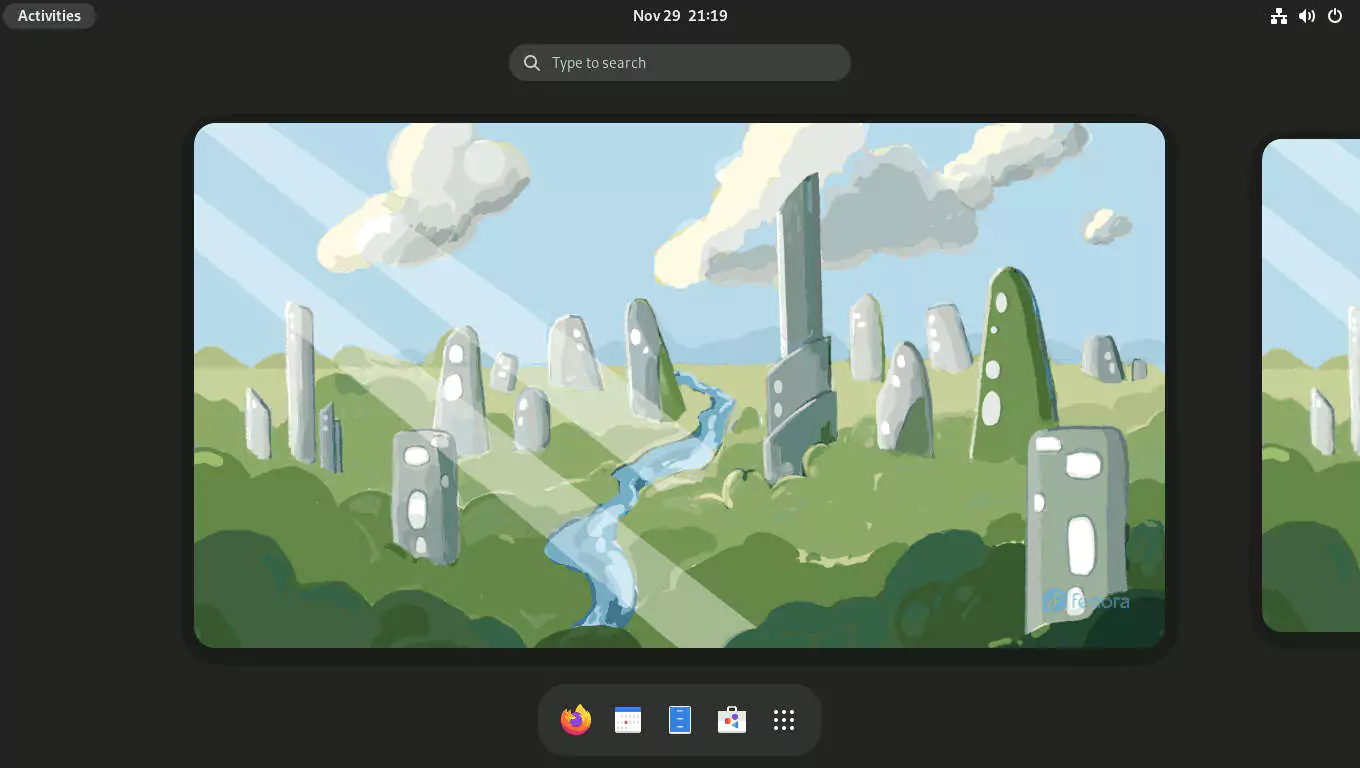
Now, open the Gnome terminal.
Set the btrfs volume label. I named the btrfs volume FEDORA, but you may name it whatever you want.
$ sudo btrfs filesystem label / FEDORA
$ sudo btrfs filesystem show /
Label: 'FEDORA'  uuid: 551495dd-6ade-4c3a-b3e2-8499fd328d84
	Total devices 1 FS bytes used 6.08GiB
	devid    1 size 97.98GiB used 8.02GiB path /dev/mapper/luks-cba88ec4-737a-4fd4-982b-f358df4e07de
Create the /var/log subvolume.
$ sudo mv -v /var/log /var/log-old
$ sudo btrfs subvolume create /var/log
$ sudo cp -arv /var/log-old/. /var/log/
$ sudo restorecon -RFv /var/log
$ sudo rm -rvf /var/log-old
If you wish to create more subvolumes, use the same methods as above.
In the /etc/fstab file, add the newly created /var/log subvolume. The updated line is displayed in amber. Replace UUID with your setup's UUID.
$ sudo vi /etc/fstab
UUID=551495dd-6ade-4c3a-b3e2-8499fd328d84 /         btrfs defaults,x-systemd.device-timeout=0 0 0
UUID=3b799f31-f992-4f32-b916-f7d048f47a80 /boot     ext4  defaults 1 2
UUID=7056-1E69                            /boot/efi vfat  umask=0077,shortname=winnt 0 2
UUID=551495dd-6ade-4c3a-b3e2-8499fd328d84 /home     btrfs subvol=home,compress=zstd:1,x-systemd.device-timeout=0 0 0
UUID=551495dd-6ade-4c3a-b3e2-8499fd328d84 /var/log  btrfs subvol=var/log,compress=zstd:1,x-systemd.device-timeout=0 0 0
Reload the /etc/fstab file to mount all filesystems.
$ sudo systemctl daemon-reload
$ sudo mount -va
Your setup should now look somewhat like this.
$ lsblk -p
NAME                                                      MAJ:MIN RM  SIZE RO TYPE  MOUNTPOINTS
/dev/zram0                                                251:0    0  3.8G  0 disk  [SWAP]
/dev/vda                                                  252:0    0  100G  0 disk
├─/dev/vda1                                               252:1    0  512M  0 part  /boot/efi
├─/dev/vda2                                               252:2    0   98G  0 part
│ └─/dev/mapper/luks-cba88ec4-737a-4fd4-982b-f358df4e07de 253:0    0   98G  0 crypt /var/log
│                                                                                   /home
│                                                                                   /
└─/dev/vda3                                               252:3    0  1.5G  0 part  /boot
Finally, list all subvolumes.
$ sudo btrfs subvolume list /
ID 256 gen 65 top level 5 path home
ID 257 gen 51 top level 5 path var/lib/machines
ID 258 gen 70 top level 5 path var/log
The var/lib/machines subvolume is created by systemd implicitly in Fedora 37 Workstation for systemd-nspawn containers.
The Fedora 37 Workstation installation is now complete.
3. Move /boot to the / Filesystem
You must now copy the contents of the ext4 /boot partition to the /boot directory in the root file system and configure GRUB to boot from it.
First, unmount the /dev/vda3 (boot) and /dev/vda1 (EFI) partitions from the /boot directory.
$ sudo umount -vR /bootThen, mount the /dev/vda3 partition in the /mnt directory temporarily.
$ sudo mount -v /dev/vda3 /mntNow, copy all boot files from /mnt to the /boot directory.
$ sudo cp -arv /mnt/. /bootUnmount the /dev/vda3 partition from /mnt and delete its entry from the /etc/fstab file. You no longer need the /dev/vda3 partition.
$ sudo umount -v /mnt
$ sudo sed -i.original '/\/boot.*ext4/d' /etc/fstab
$ sudo systemctl daemon-reload
$ sudo mount -va
Restore the SELinux labels to the /boot directory.
$ sudo restorecon -RFv /bootEnable the CRYPTODISK option in GRUB. When enabled, it will check the encrypted disks and generate the additional commands needed to access them during boot.
$ echo 'GRUB_ENABLE_CRYPTODISK=y' | sudo tee -a /etc/default/grub
$ sudo grub2-mkconfig -o /boot/grub2/grub.cfg
The kernel and initrd paths are configured to look in the /boot partition (/dev/vda3).
$ sudo grubby --info=DEFAULT
index=0
kernel="/vmlinuz-6.0.7-301.fc37.x86_64"
args="ro rd.luks.uuid=luks-cba88ec4-737a-4fd4-982b-f358df4e07de rhgb quiet"
root="UUID=551495dd-6ade-4c3a-b3e2-8499fd328d84"
initrd="/initramfs-6.0.7-301.fc37.x86_64.img"
title="Fedora Linux (6.0.7-301.fc37.x86_64) 37 (Workstation Edition)"
id="a8e42b5bf3ef4631a3af52c673d68d12-6.0.7-301.fc37.x86_64"
This must be changed to the /boot directory in the / filesystem (/dev/vda2). To do this, first, remove the old Boot Loader Specification (BLS) configuration files.
$ sudo sh -c 'rm -i /boot/loader/entries/*.conf'Then recreate the BLS config file by adding the kernel image.
$ sudo kernel-install -v add $(uname -r) /lib/modules/$(uname -r)/vmlinuzTake a look at the newly created BLS configuration files. The ‘/boot‘ directory should be added to the kernel and initrd lines.
$ sudo grubby --info=DEFAULT
index=0
kernel="/boot/vmlinuz-6.0.7-301.fc37.x86_64"
args="ro rd.luks.uuid=luks-cba88ec4-737a-4fd4-982b-f358df4e07de rhgb quiet"
root="UUID=551495dd-6ade-4c3a-b3e2-8499fd328d84"
initrd="/boot/initramfs-6.0.7-301.fc37.x86_64.img"
title="Fedora Linux (6.0.7-301.fc37.x86_64) 37 (Workstation Edition)"
id="a8e42b5bf3ef4631a3af52c673d68d12-6.0.7-301.fc37.x86_64"
As CRYPTODISK is now enabled, you must make changes to /boot/efi/EFI/fedora/grub.cfg file as well.
List your device's UUIDs first.
$ lsblk -po name,uuid,mountpoints /dev/vda
NAME                                                      UUID                                 MOUNTPOINTS
/dev/vda
├─/dev/vda1                                               7056-1E69                            /boot/efi
├─/dev/vda2                                               cba88ec4-737a-4fd4-982b-f358df4e07de
│ └─/dev/mapper/luks-cba88ec4-737a-4fd4-982b-f358df4e07de 551495dd-6ade-4c3a-b3e2-8499fd328d84 /var/log
│                                                                                              /home
│                                                                                              /
└─/dev/vda3                                               3b799f31-f992-4f32-b916-f7d048f47a80
Set up access to the encrypted boot device by adding the cryptomount command.
$ CRYPTOUUID="$(sudo cryptsetup luksUUID /dev/vda2 | tr -d -)"
$ sudo sed -i.backup1 "1i cryptomount -u ${CRYPTOUUID}" /boot/efi/EFI/fedora/grub.cfg
Replace the /dev/vda3 device UUID with the UUID of a LUKS encrypted device where the / file system is mounted.
$ OLDUUID="$(lsblk -dno uuid /dev/vda3)"
$ NEWUUID="$(lsblk -dno uuid /dev/mapper/luks-$(sudo cryptsetup luksUUID /dev/vda2))"
$ sudo sed -i.backup2 "s/${OLDUUID}/${NEWUUID}/" /boot/efi/EFI/fedora/grub.cfg
And add /boot to the grub2 path.
$ sudo sed -i.backup3 's#($dev)/grub2#($dev)/boot/grub2#' /boot/efi/EFI/fedora/grub.cfgIn the end, the modifications to the /boot/efi/EFI/fedora/grub.cfg file should be from this ...
search --no-floppy --fs-uuid --set=dev 3b799f31-f992-4f32-b916-f7d048f47a80
set prefix=($dev)/grub2
export $prefix
configfile $prefix/grub.cfg
... to this.
cryptomount -u cba88ec4737a4fd4982bf358df4e07de
search --no-floppy --fs-uuid --set=dev 551495dd-6ade-4c3a-b3e2-8499fd328d84
set prefix=($dev)/boot/grub2
export $prefix
configfile $prefix/grub.cfg
The changes are as follows.
- Line 1: Amber color. Set up access to the encrypted boot device. The UUID here is of the /dev/vda2 partition without dashes (-).
- Line 2: Cyan color. Replace the UUID of /boot partition. The new UUID is of the LUKS encrypted / filesystem.
- Line 3: Orange color: Insert the '/boot' directory into the 'set prefix' line.
Finally, you need to change the Password-Based Key Derivation Function (PBKDF) algorithm for LUKS keyslot. By default PBKDF for LUKS2 is argon2id.
$ sudo cryptsetup luksDump /dev/vda2 | grep 'PBKDF:'
	PBKDF:      argon2id
However, GRUB currently only supports pbkdf2. As a result, you must change the PBKDF algorithm. You should also change the iteration count. The more powerful your CPU, the higher the iteration count. And, the higher the iteration count, the longer it takes to unlock the LUKS in the GRUB.
For pbkdf2, the minimum iteration count is 1000 and the maximum is 4294967295. I will set the iteration count to 500000. Lowering the iterations reduces security. To get around it, use a stronger passphrase with higher entropy.
$ sudo cryptsetup luksChangeKey \
    --key-slot 0 \
    --pbkdf pbkdf2 \
    --pbkdf-force-iterations 500000 \
    --force-password \
    /dev/vda2
Set the new password to the same one you used before.
Review the device LUKS encryption details.
$ sudo cryptsetup luksDump /dev/vda2
LUKS header information
Version:       	2
Epoch:         	4
Metadata area: 	16384 [bytes]
Keyslots area: 	16744448 [bytes]
UUID:          	cba88ec4-737a-4fd4-982b-f358df4e07de
Label:         	(no label)
Subsystem:     	(no subsystem)
Flags:       	(no flags)
Data segments:
  0: crypt
	offset: 16777216 [bytes]
	length: (whole device)
	cipher: aes-xts-plain64
	sector: 512 [bytes]
Keyslots:
  0: luks2
	Key:        512 bits
	Priority:   normal
	Cipher:     aes-xts-plain64
	Cipher key: 512 bits
	PBKDF:      pbkdf2
	Hash:       sha256
	Iterations: 500000
	Salt:       b4 02 c7 a4 75 18 30 8c 01 bf 38 c4 42 c9 73 a7
	            a6 da 5b d4 f6 a2 df f5 0e 1e 70 04 85 eb e5 85
	AF stripes: 4000
	AF hash:    sha256
	Area offset:32768 [bytes]
	Area length:258048 [bytes]
	Digest ID:  0
Tokens:
Digests:
  0: pbkdf2
	Hash:       sha256
	Iterations: 93356
	Salt:       d6 2f cc 33 ee 65 86 42 7c 83 9c 86 00 c3 fe 01
	            c7 80 74 6f 61 02 a0 e4 39 08 8a 30 e6 36 46 af
	Digest:     7f 06 0a 46 6e 03 3c a1 3b 89 58 18 df c7 2e 5f
	            f8 5b be 8f 7b 8f 9e be 27 fb 95 00 2c 04 41 10
Reboot the computer now to ensure that everything is working correctly. You will be prompted for the passphrase twice. The first time is before loading GRUB, and the second time is before mounting the root file system.
Depending on your computer's CPU, it may take up to 15 seconds for the GRUB to display the second passphrase prompt. So please be patient.
When you input your passphrase in the first LUKS prompt, no "*" cursor indication appears. So you should assume you have entered your passphrase correctly. Simply enter your LUKS passphrase blindly and hit the [ENTER] key.
4. Remove the /boot Partition and Reclaim the Space
You no longer need the /dev/vda3 partition since you moved the boot files to the /boot directory in the / file system. So, you can safely remove the /dev/vda3 partition from the partition table and reclaim the 1.5 GiB it occupies.
Run the gdisk utility.
$ sudo gdisk /dev/vdaOn the command input prompt, enter the key p to print the partition table.
Command (? for help): p
Disk /dev/vda: 209715200 sectors, 100.0 GiB
...
Total free space is 4029 sectors (2.0 MiB)

Number  Start (sector)    End (sector)  Size       Code  Name
   1            2048         1050623   512.0 MiB   EF00  EFI System Partition
   2         1050624       206571519   98.0 GiB    8300
   3       206571520       209713151   1.5 GiB     8300
Delete partition #3 (/dev/vda3) by pressing the key d and then the number 3.
Command (? for help): d
Partition number (1-3): 3

Command (? for help): p
...
Total free space is 3145661 sectors (1.5 GiB)

Number  Start (sector)    End (sector)  Size       Code  Name
   1            2048         1050623   512.0 MiB   EF00  EFI System Partition
   2         1050624       206571519   98.0 GiB    8300
Then, delete partition #2 (/dev/vda2) as well by pressing the key d and then the number 2. Don’t worry, until you permanently write the modifications, the data will not be lost.
Command (? for help): d
Partition number (1-2): 2

Command (? for help): p
...
Total free space is 208666557 sectors (99.5 GiB)

Number  Start (sector)    End (sector)  Size       Code  Name
   1            2048         1050623   512.0 MiB   EF00  EFI System Partition
Now, create a new partition by pressing the key n. Choose the entire disc space by pressing the [Enter] key four times. Don’t input any values; instead, let it use the defaults. Your data will remain intact with the new expanded size.
Command (? for help): n
Partition number (2-128, default 2):
First sector (34-209715166, default = 1050624) or {+-}size{KMGTP}:
Last sector (1050624-209715166, default = 209713151) or {+-}size{KMGTP}:
Current type is 8300 (Linux filesystem)
Hex code or GUID (L to show codes, Enter = 8300):
Changed type of partition to 'Linux filesystem'

Command (? for help): p
...
Total free space is 4029 sectors (2.0 MiB)

Number  Start (sector)    End (sector)  Size       Code  Name
   1            2048         1050623   512.0 MiB   EF00  EFI System Partition
   2         1050624       209713151   99.5 GiB    8300  Linux filesystem
As an option, you can modify the partition name.
Command (? for help): c
Partition number (1-2): 2
Enter name: Fedora 37 Workstation

Command (? for help): p
...

Number  Start (sector)    End (sector)  Size       Code  Name
   1            2048         1050623   512.0 MiB   EF00  EFI System Partition
   2         1050624       209713151   99.5 GiB    8300  Fedora 37 Workstation
Finally, hit the w key to permanently save the table to disk and quit.
Command (? for help): w

Final checks complete. About to write GPT data. THIS WILL OVERWRITE EXISTING
PARTITIONS!!

Do you want to proceed? (Y/N): y
OK; writing new GUID partition table (GPT) to /dev/vda.
Warning: The kernel is still using the old partition table.
The new table will be used at the next reboot or after you
run partprobe(8) or kpartx(8)
The operation has completed successfully.
For the changes to take effect, restart the system. After restarting the system, use the following command to reclaim all available space on the BTRFS volume.
$ sudo btrfs filesystem resize max /Now check the space used up by the BTRFS volume.
$ sudo btrfs filesystem show /
Label: 'FEDORA'  uuid: 551495dd-6ade-4c3a-b3e2-8499fd328d84
	Total devices 1 FS bytes used 6.25GiB
	devid    1 size 99.48GiB used 9.02GiB path /dev/mapper/luks-cba88ec4-737a-4fd4-982b-f358df4e07de
List to verify whether the /dev/vda3 partition has actually been removed.
$ lsblk -p /dev/vda
NAME                                                      MAJ:MIN RM  SIZE RO TYPE  MOUNTPOINTS
/dev/vda                                                  252:0    0  100G  0 disk
├─/dev/vda1                                               252:1    0  512M  0 part  /boot/efi
└─/dev/vda2                                               252:2    0 99.5G  0 part
  └─/dev/mapper/luks-cba88ec4-737a-4fd4-982b-f358df4e07de 253:0    0 99.5G  0 crypt /var/log
                                                                                    /home
                                                                                    /
5. Bypass the Additional Passphrase Prompt
While GRUB asks for a passphrase to unlock the encrypted /boot files, this information is not passed on to initramfs. As a result, during the initramfs stage, the root (/) must be unlocked once again. This means that either the user must input his passphrase twice, or the initramfs image itself must include a file with the root partition’s passphrase.
Because the initramfs image will be in the /boot directory of the encrypted root partition (/), the passphrase will be secure when the data is at rest. However, once the data is online, it must be safeguarded by making it read-only for the root user.
So let’s create a key file so that the passphrase is only asked once.
Create /etc/cryptsetup-keys.d directory if it is not already there.
$ sudo mkdir /etc/cryptsetup-keys.dCreate a key file with 4KiB of random data. The key file has to be in volume.key format.
$ sudo dd if=/dev/random \
    of=/etc/cryptsetup-keys.d/luks-$(sudo cryptsetup luksUUID /dev/vda2).key \
    bs=512 count=8
Ensure that only the root user has read access to the key file.
$ sudo chmod 0400 /etc/cryptsetup-keys.d/*.keyAttach the created key to the encrypted device’s available key slot. When prompted for a passphrase, enter the same LUKS passphrase.
$ sudo cryptsetup luksAddKey \
    --pbkdf pbkdf2 \
    --pbkdf-force-iterations 500000 \
    /dev/vda2 \
    /etc/cryptsetup-keys.d/luks-$(sudo cryptsetup luksUUID /dev/vda2).key
Open (or create) the /etc/dracut.conf.d/cryptodisk.conf file.
$ sudo vi /etc/dracut.conf.d/cryptodisk.confAnd add the following line to include the key in the initramfs image.
install_items+=" /etc/cryptsetup-keys.d/* "Finally, rebuild the initramfs image.
$ sudo dracut -vfReboot the computer and verify that everything is operating correctly. The LUKS passphrase should only be asked once.
6. Install and Configure Snapper
Install snapper and the optional package python3-dnf-plugin-snapper. The python3-dnf-plugin-snapper package allows you to create pre and post snapshots every time you install a package on the system with the dnf package manager.
$ sudo dnf install snapper python3-dnf-plugin-snapperCreate new snapper configurations named root and home for the Btrfs volume at / and /home, respectively.
$ sudo snapper -c root create-config /
$ sudo snapper -c home create-config /home
Verify the snapper configuration files have been created.
$ sudo snapper list-configs
Config | Subvolume
-------+----------
home   | /home
root   | /
Allow the regular user to list snapshots. Add your user name in the snapper's root and home configurations.
$ sudo snapper -c root set-config ALLOW_USERS=$USER SYNC_ACL=yes
$ sudo snapper -c home set-config ALLOW_USERS=$USER SYNC_ACL=yes
Change the group permissions of the /.snapshots and /home/.snapshots directories to your user name.
$ sudo chown -R :$USER /.snapshots
$ sudo chown -R :$USER /home/.snapshots
Finally, in the /etc/fstab file, add the newly created snapshots subvolumes. The updated lines are displayed in amber.
$ sudo vi /etc/fstab
UUID=551495dd-6ade-4c3a-b3e2-8499fd328d84 /                btrfs defaults,x-systemd.device-timeout=0 0 0
UUID=7056-1E69                            /boot/efi        vfat  umask=0077,shortname=winnt 0 2
UUID=551495dd-6ade-4c3a-b3e2-8499fd328d84 /home            btrfs subvol=home,compress=zstd:1,x-systemd.device-timeout=0 0 0
UUID=551495dd-6ade-4c3a-b3e2-8499fd328d84 /var/log         btrfs subvol=var/log,compress=zstd:1,x-systemd.device-timeout=0 0 0
UUID=551495dd-6ade-4c3a-b3e2-8499fd328d84 /.snapshots      btrfs subvol=.snapshots,compress=zstd:1,x-systemd.device-timeout=0 0 0
UUID=551495dd-6ade-4c3a-b3e2-8499fd328d84 /home/.snapshots btrfs subvol=home/.snapshots,compress=zstd:1,x-systemd.device-timeout=0 0 0
Reload the /etc/fstab file.
$ sudo systemctl daemon-reload
$ sudo mount -va
Your setup should look something like this.
$ lsblk -p /dev/vda
NAME                                                      MAJ:MIN RM  SIZE RO TYPE  MOUNTPOINTS
/dev/vda                                                  252:0    0  100G  0 disk
├─/dev/vda1                                               252:1    0  512M  0 part  /boot/efi
└─/dev/vda2                                               252:2    0 99.5G  0 part
  └─/dev/mapper/luks-cba88ec4-737a-4fd4-982b-f358df4e07de 253:0    0 99.5G  0 crypt /home/.snapshots
                                                                                    /.snapshots
                                                                                    /var/log
                                                                                    /home
                                                                                    /
And your subvolumes will look like this.
$ sudo btrfs subvolume list /
ID 256 gen 141 top level 5 path home
ID 257 gen 134 top level 5 path var/lib/machines
ID 258 gen 146 top level 5 path var/log
ID 259 gen 141 top level 5 path .snapshots
ID 260 gen 141 top level 256 path home/.snapshots
Enable snapshot booting by appending the SUSE_BTRFS_SNAPSHOT_BOOTING="true" option to the /etc/default/grub file.
$ echo 'SUSE_BTRFS_SNAPSHOT_BOOTING="true"' | sudo tee -a /etc/default/grubBecause snapshot booting is now enabled, you must make changes to the /boot/efi/EFI/fedora/grub.cfg file as well.
$ sudo sed -i '1i set btrfs_relative_path="yes"' /boot/efi/EFI/fedora/grub.cfgUpdate the grub.cfg file.
$ sudo grub2-mkconfig -o /boot/grub2/grub.cfgFinally, disable the GRUB menu auto-hide feature.
$ sudo grub2-editenv - unset menu_auto_hideThe snapper configuration is now complete.
List the snapshots for / volume. For the root, you may use snapper -c root ls or simply snapper ls. Both provide the same output.
$ snapper ls
 # | Type   | Pre # | Date | User | Cleanup | Description | Userdata
---+--------+-------+------+------+---------+-------------+---------
0  | single |       |      | root |         | current     |
List the snapshots for /home subvolume.
$ snapper -c home ls
 # | Type   | Pre # | Date | User | Cleanup | Description | Userdata
---+--------+-------+------+------+---------+-------------+---------
0  | single |       |      | root |         | current     |
At this stage, you do not have any snapshots, we will create some later.
7. Install and Configure Grub-Btrfs
Consider the following scenario: you make a mistake, and the system fails to start properly the next time. You may want to revert to a previously working snapshot and reboot again.
The grub-btrfs package provides this functionality. The package adds "Fedora Linux snapshots" to the GRUB menu and allows you to boot to a snapshot in read-only mode to test it before rolling back to it in read-write mode.
So, clone the grub-btrfs repository.
$ git clone https://github.com/Antynea/grub-btrfs
$ cd grub-btrfs
$ git switch Add-systemd-volatile
The setup is initially configured to work with Arch and Gentoo out of the box. To make it work with Fedora, you must make a few changes to the grub-btrfs config file.
$ sed -i 's/#GRUB_BTRFS_SYSTEMD_VOLATILE=/GRUB_BTRFS_SYSTEMD_VOLATILE=/' config
$ sed -i 's/#GRUB_BTRFS_GRUB_DIRNAME=/GRUB_BTRFS_GRUB_DIRNAME=/' config
$ sed -i '/#GRUB_BTRFS_MKCONFIG=/c\GRUB_BTRFS_MKCONFIG=/sbin/grub2-mkconfig' config
$ sed -i 's/#GRUB_BTRFS_SCRIPT_CHECK=/GRUB_BTRFS_SCRIPT_CHECK=/' config
Then install it.
$ sudo make INITCPIO=true installUpdate the grub.cfg file. You will receive the 'No snapshots found' error since you have not yet created any snapshots, but don't worry, it will function properly after you do.
$ sudo grub2-mkconfig -o /boot/grub2/grub.cfgFinally, enable the grub-btrfs.path
$ sudo systemctl enable --now grub-btrfs.pathYour grub-btrfs installation is now complete. You may now delete the cloned grub-btrfs repository.
$ cd ..
$ rm -rvf grub-btrfs
8. Test the Snapper's Undochange and Rollback Features
I ran several tests to confirm that everything is operating well and that there are no problems. Please see the Tests section of the article "How to Install Fedora 37 with Snapper and Grub-Btrfs for Full System Rollback" for more information.
9. Conclusion
Now that you have installed Fedora 37 with LUKS Full Disk Encryption, snapper, and grub-btrfs, you can now be certain that your data at rest is safe, and if you make a mistake, you can easily roll back to a previous functioning snapshot.
You can also better secure your machine from Evil Maid attacks by using UEFI Secure Boot custom key enrollment and a self-signed kernel and bootloader. Check out my other blog 'Enable Fedora UEFI Secure Boot with Custom Keys and Self-Signed Bootloader, Kernel, and Modules' on how to do this.
If you want to configure the snapper to take snapshots at predetermined intervals. Visit the Arch Wiki’s Snapper page for more information.